Display options
The eye icon at the top right opens the display options: the information and its order in the first column, as well as the level of detail on the booking bars.
The eye icon is available in the Employees view, the Projects view, the Service week, the Absences view and the Equipment view. The exact display options may vary slightly by view.
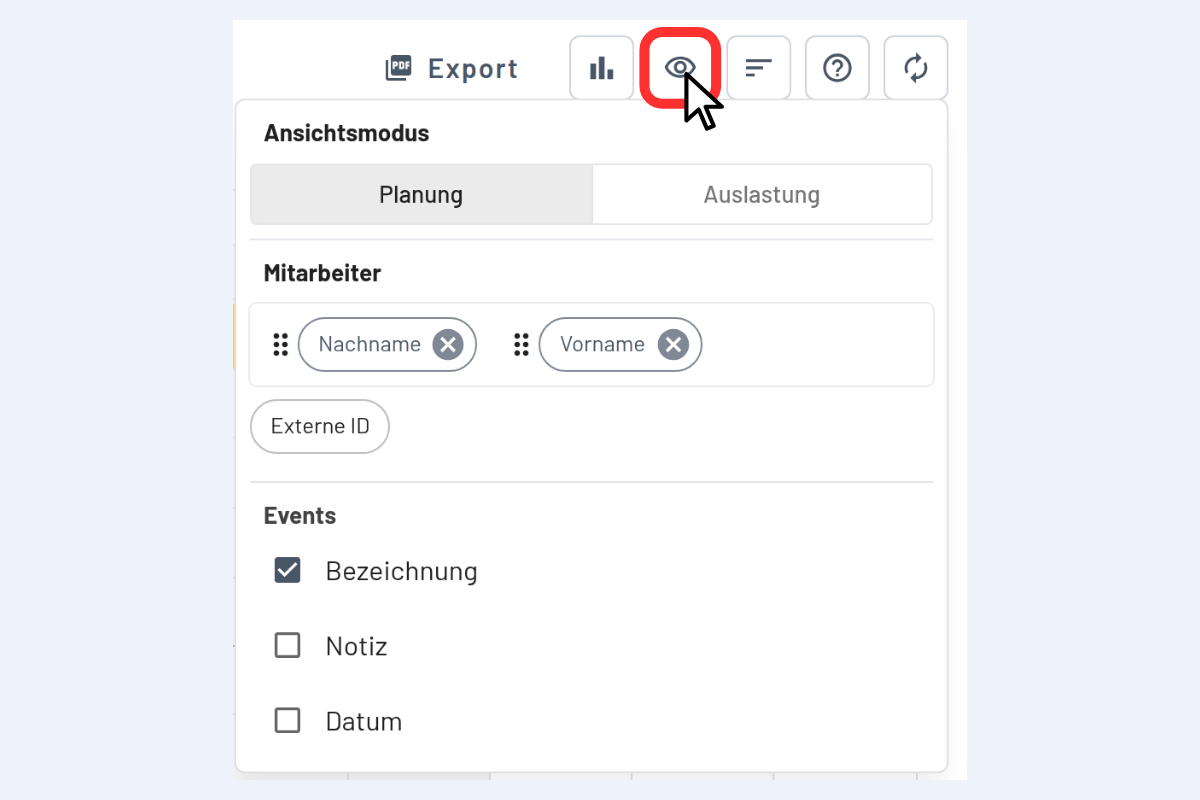
Where the display options apply
The display options apply to the view you are currently in. In the employee view they determine how employees are shown, in the project view how projects are shown.
This setting does not only affect the first column of the view itself, but also the booking bars in the other views. If, for example, the External ID is removed in the project view, it no longer appears on the project bookings in the employee view either.
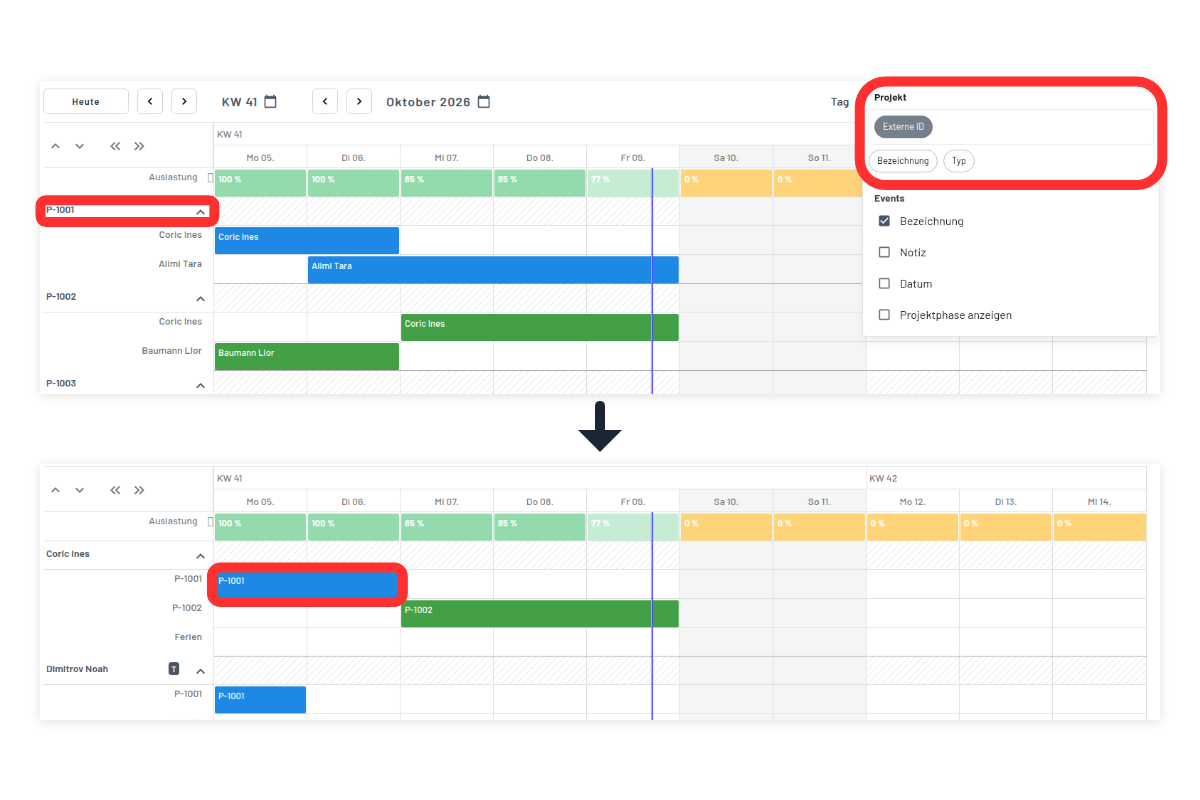
If you want to see the project name instead of the project number on the bookings in the employee view, switch to the project view and adjust the display options there.
First column
The first column lets you define which information is shown and in which order.
- Change the order: Click the dots to the left of an item, hold, and drag it to the desired position. For example, to show the first name before the last name, click the dots to the left of the First name field and drag it to the top.
- Add a field: Below the activated fields, greyed-out fields are shown that are not currently in the first column (in the example image, the External ID field). Clicking a field activates it and it appears in the first column.
- Remove a field: Click the cross next to the corresponding field to remove it from the first column.
Level of detail on the booking
The level of detail on the booking bars can be adjusted. Available options: name, notes and schedule (date).
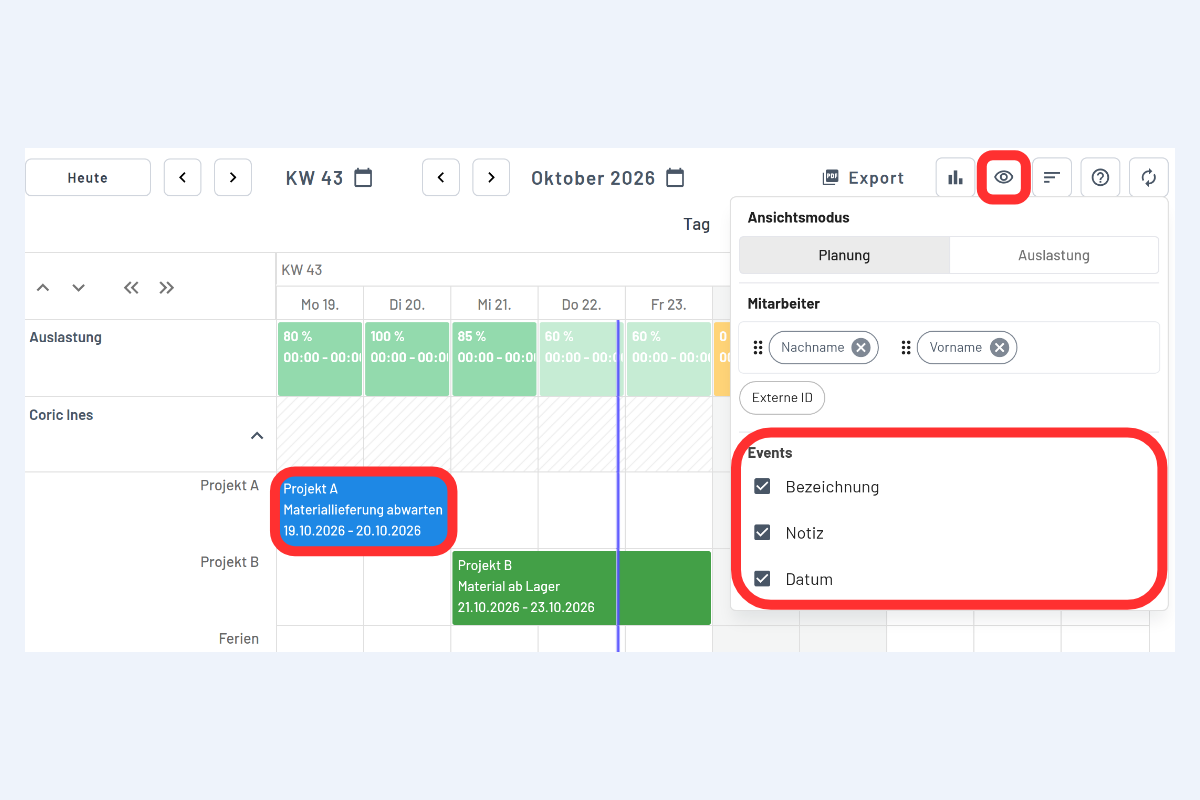
Width of the first column
The width of the first column is adjusted with the double arrows above "Utilization", useful for long names or large tables. "‹‹" makes the column narrower, "››" makes it wider, each in small steps. The setting takes effect immediately.
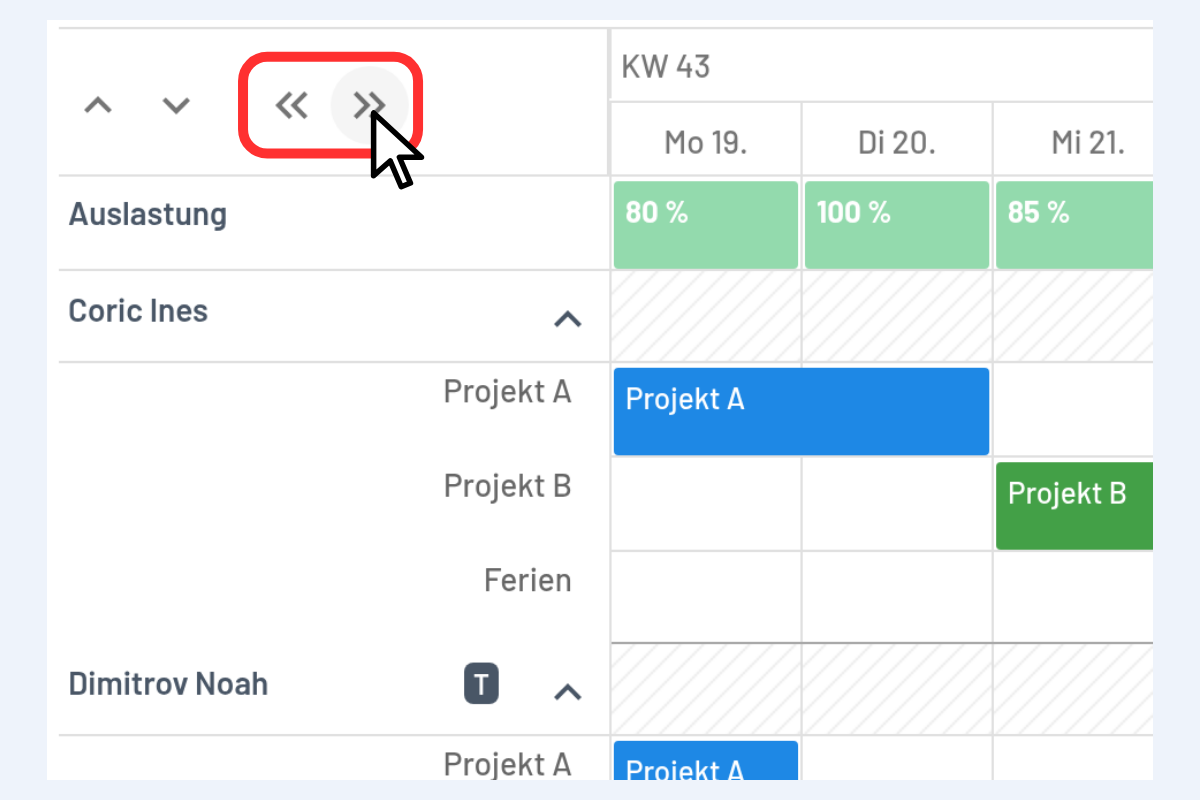
The width is saved separately for each of the five views:
- Employees, including utilization
- Projects
- Service week
- Absences
- Equipment
Within the same view, the width applies to all time scales. It is kept per user in the same browser, also after logging in again. It is not carried over to other devices or browsers.
Display options are saved per user and persist after a reload.